The Stencil bufferis use to create outlining effect.
the Stencil Buffer, just like the Depth Buffer, holds a value for each pixel, these values being used for image masking in general.
Unlike the Depth Buffer though, where each pixel holds between 2 and 4 bytes of data,
for the Stencil Buffer each pixel only holds 1 byte of data, so values from 0 to 255.
But you'll mainly only use the values of 0 and 1.
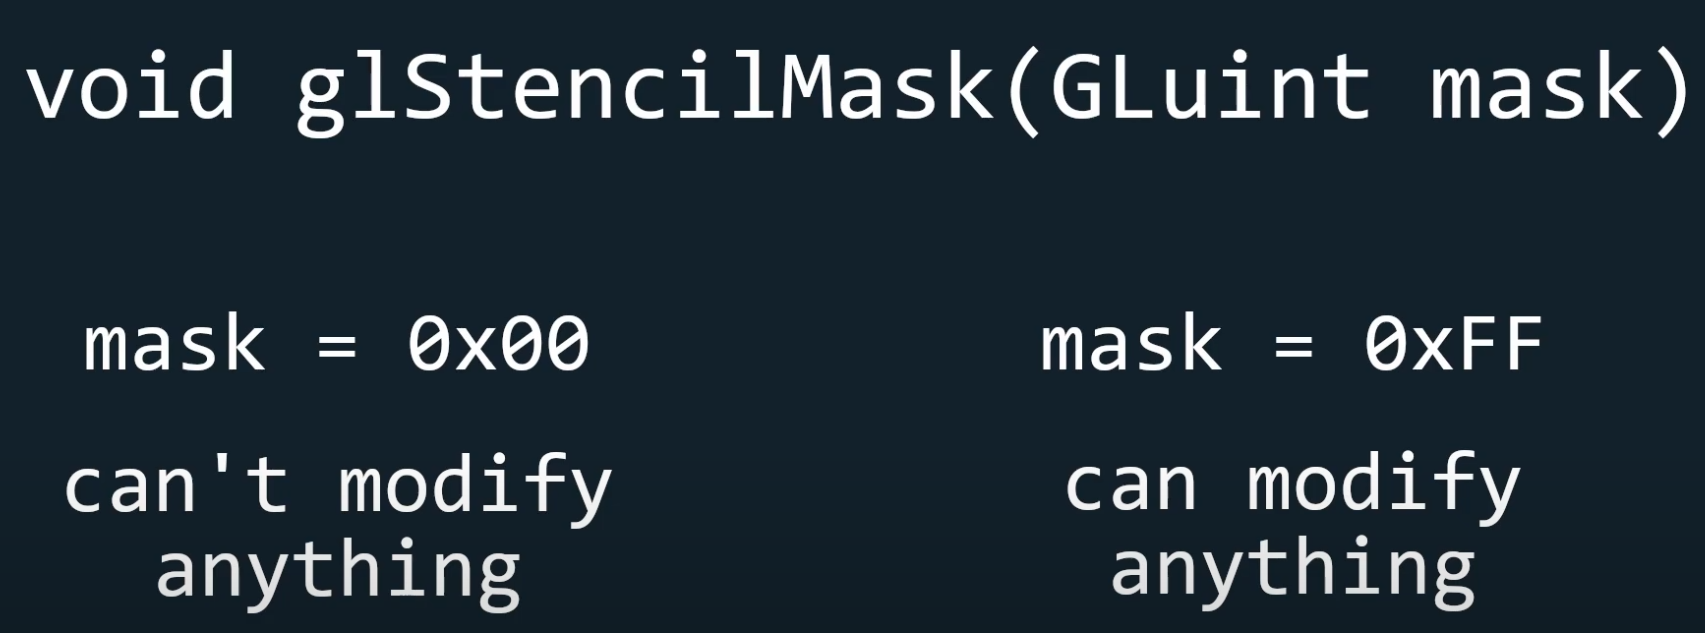
glStencilMask()
So let's look at how we can work with this new buffer.
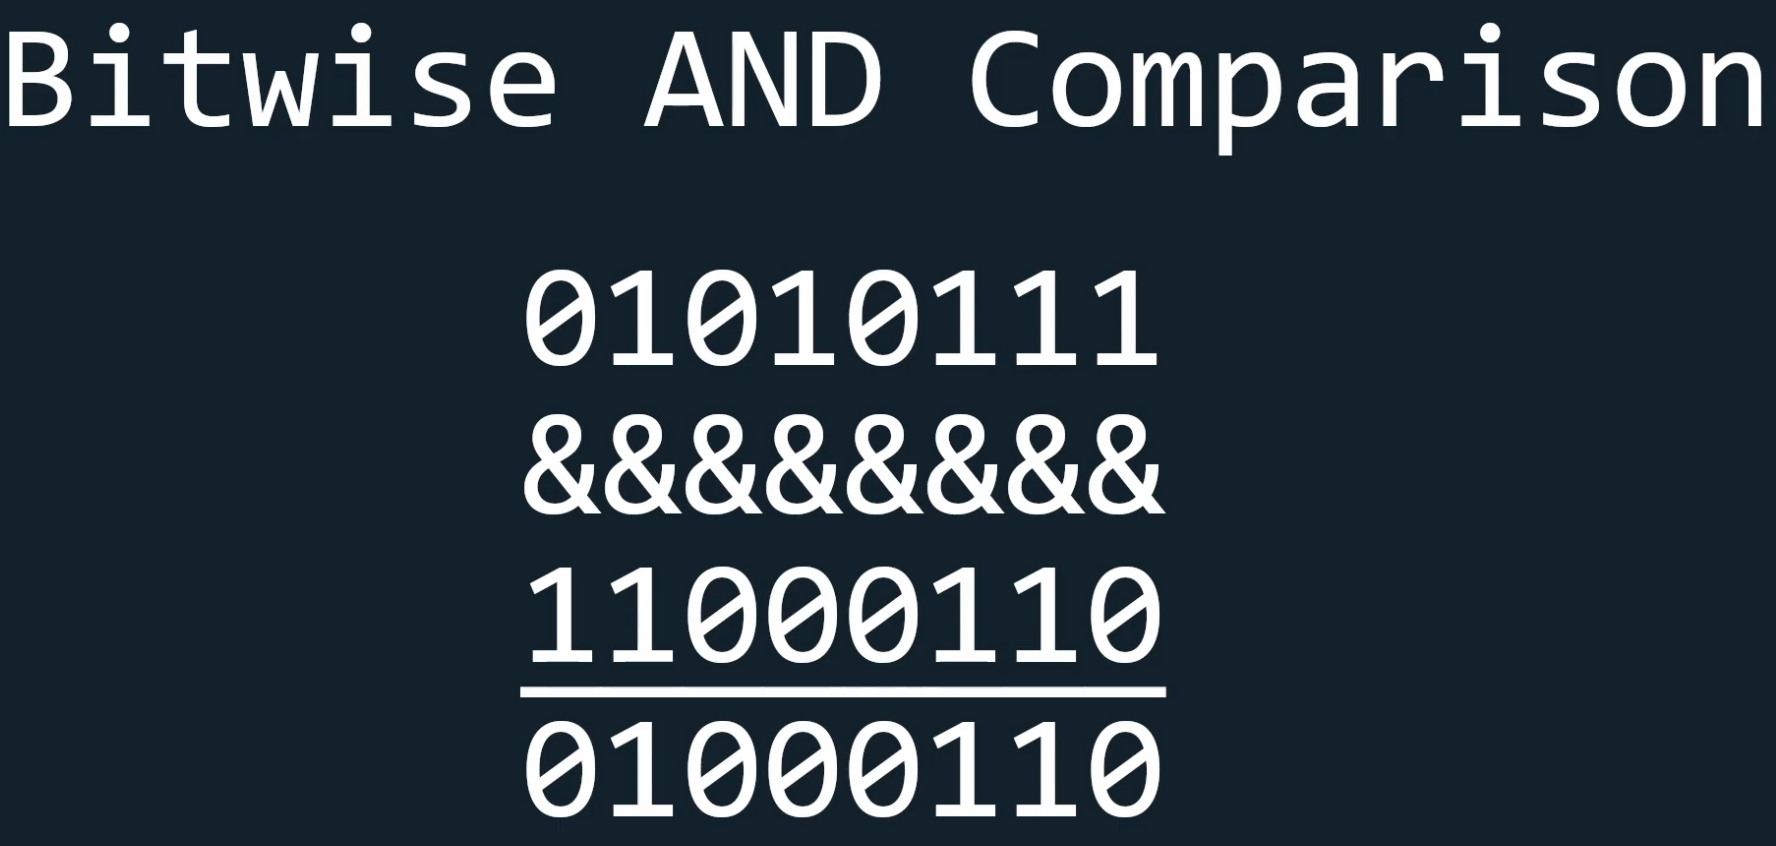
It simply takes a pixel from the mask, and a corresponding pixel from the Stencil Buffer, and applies a bitwise "AND" comparison on them.
Keep in mind each pixel has a byte of data.(so 8 bits.)
Therefore if we input 0x00 into glStencilMask, which means that we have 8 bits equal to 0, then all the comparisons will fail and the Stencil Buffer won't change at all.
But if we input 0xFF into glStencilMask, then all the bits of the mask will be 1 since 0xFF is equal to 8 ones, and so we'll be able to modify any part of the Stencil Buffer.
* notation
"0x" is a prefix that indicates the following value is in hexadecimal notation
0x00 = 0000 0000
0xFF = 1111 1111
0x0010 = 0000 0000 0001 0000 (16 bits, 2 byte)
let's look at two more functions we can make use of: glStencilFunc, and glStencilOp.

glStencilFunc allows us to control how the Stencil Buffer passes a test or fails a test,
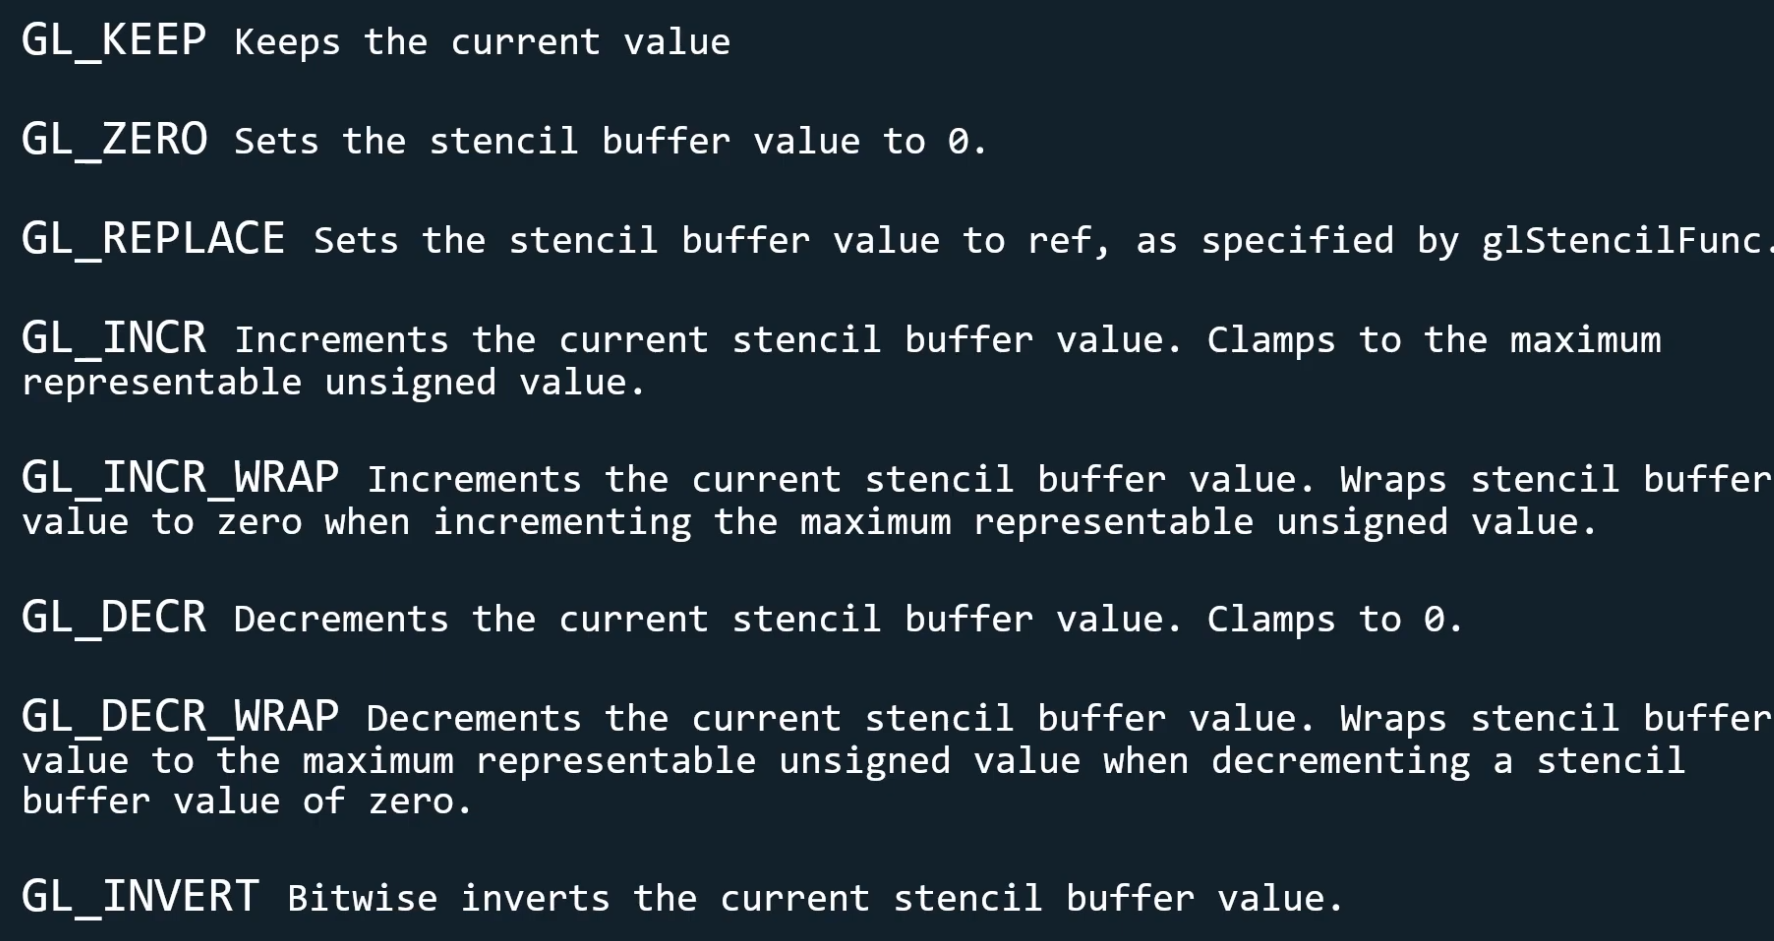
while glStencilOp allows us to dictate what happens when the stencil test fails, when the stencil test passes but the depth test fails, and when both pass.
glStencilFunc()
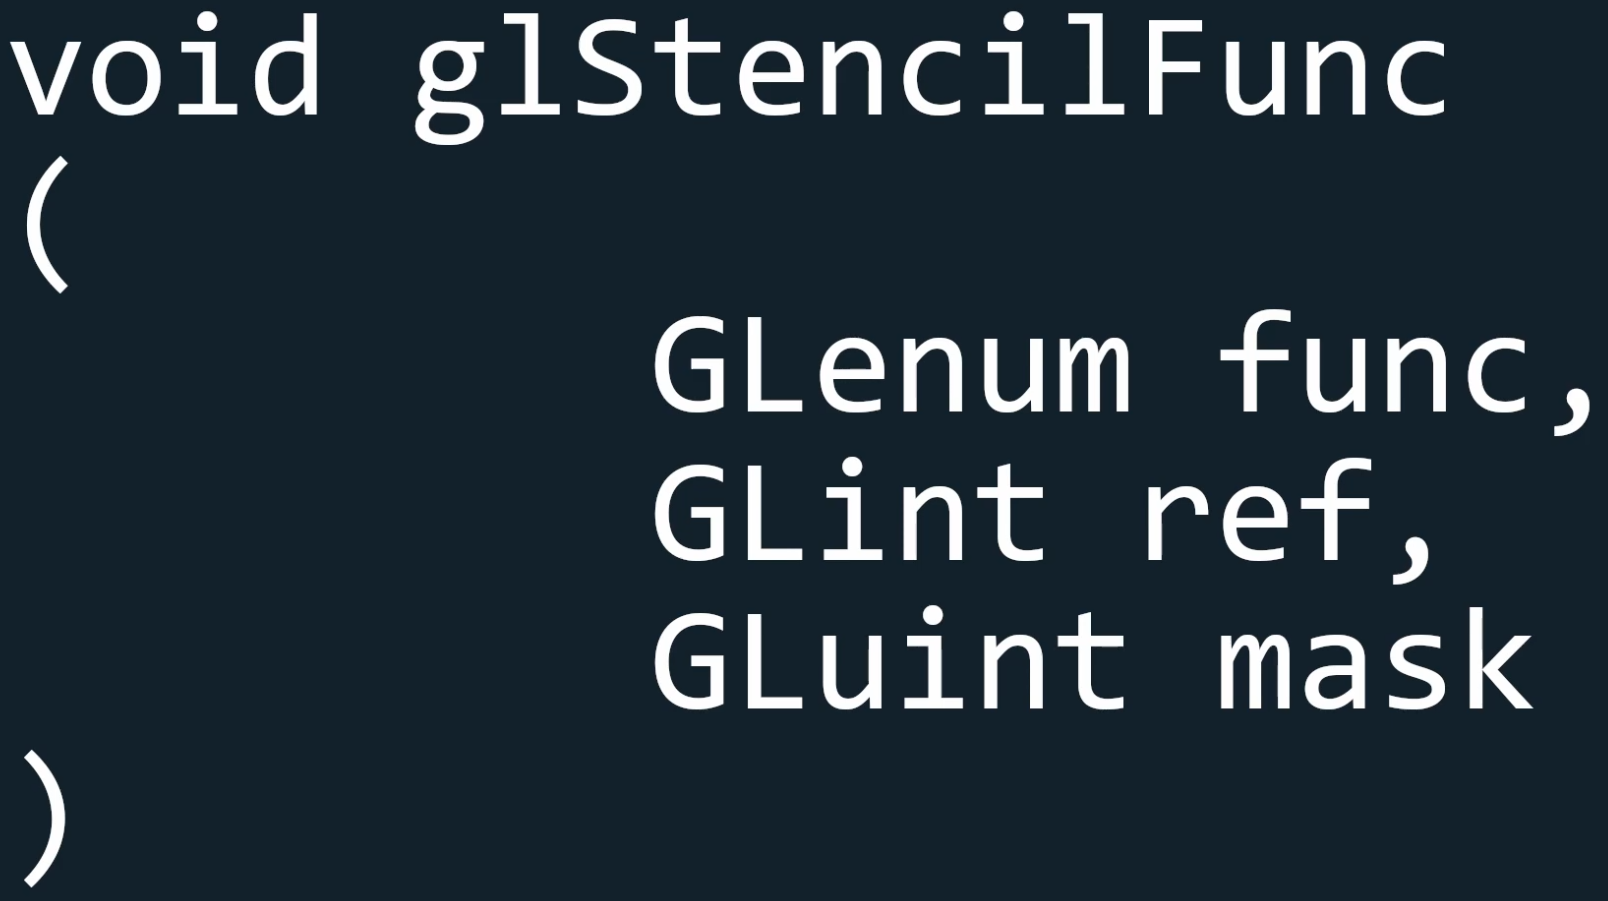
it takes in three arguments: a function, a reference value, and mask.
The reference value is simply the value we use to compare in the function.
The function can be one of these, by default being set to GL_ALWAYS so the test always passes.
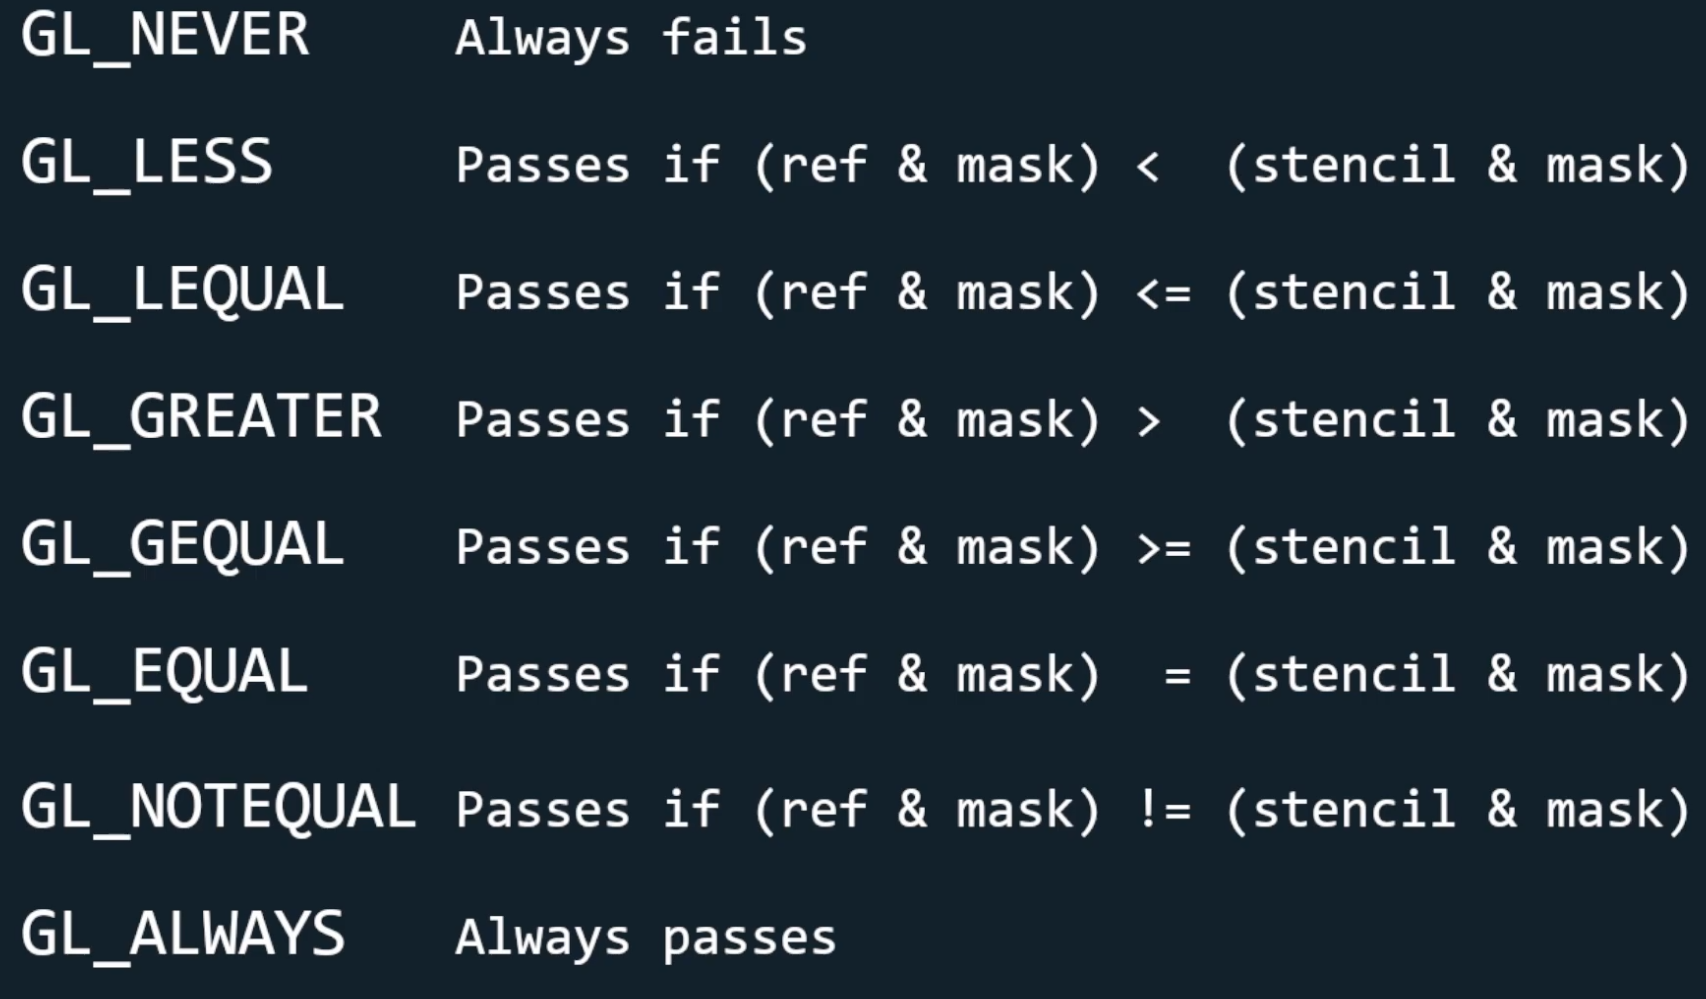
Notice how before comparing the stencil value with the reference value we apply a bitwise AND operation to both using the mask.
This means that if you want to compare the numerical value of the two accurately you will want your mask to be 0xFF so that nothing changes.
glStencilOp()
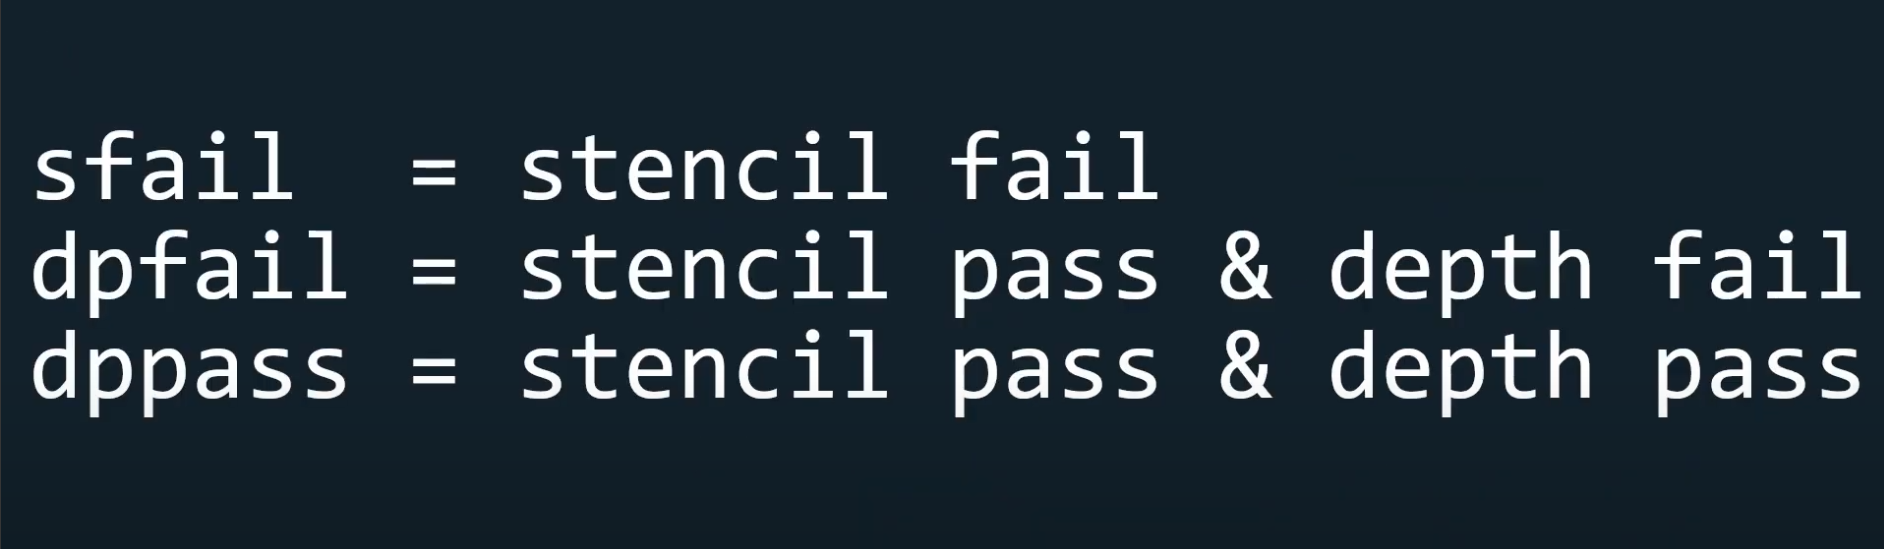
Now for glStencilOp, it has three arguments: sfail, dpfail, and dppass.

these stand for stencil fail, depth fail, and depth pass.
as i said, glStencilOp allows us to dictate what happens when the stencil test fails, when the stencil test passes but the depth test fails, and when both pass.
let's look how they control with the result of the test.
The Stencil buffer can be used for many things such as portals, mirrors, and more
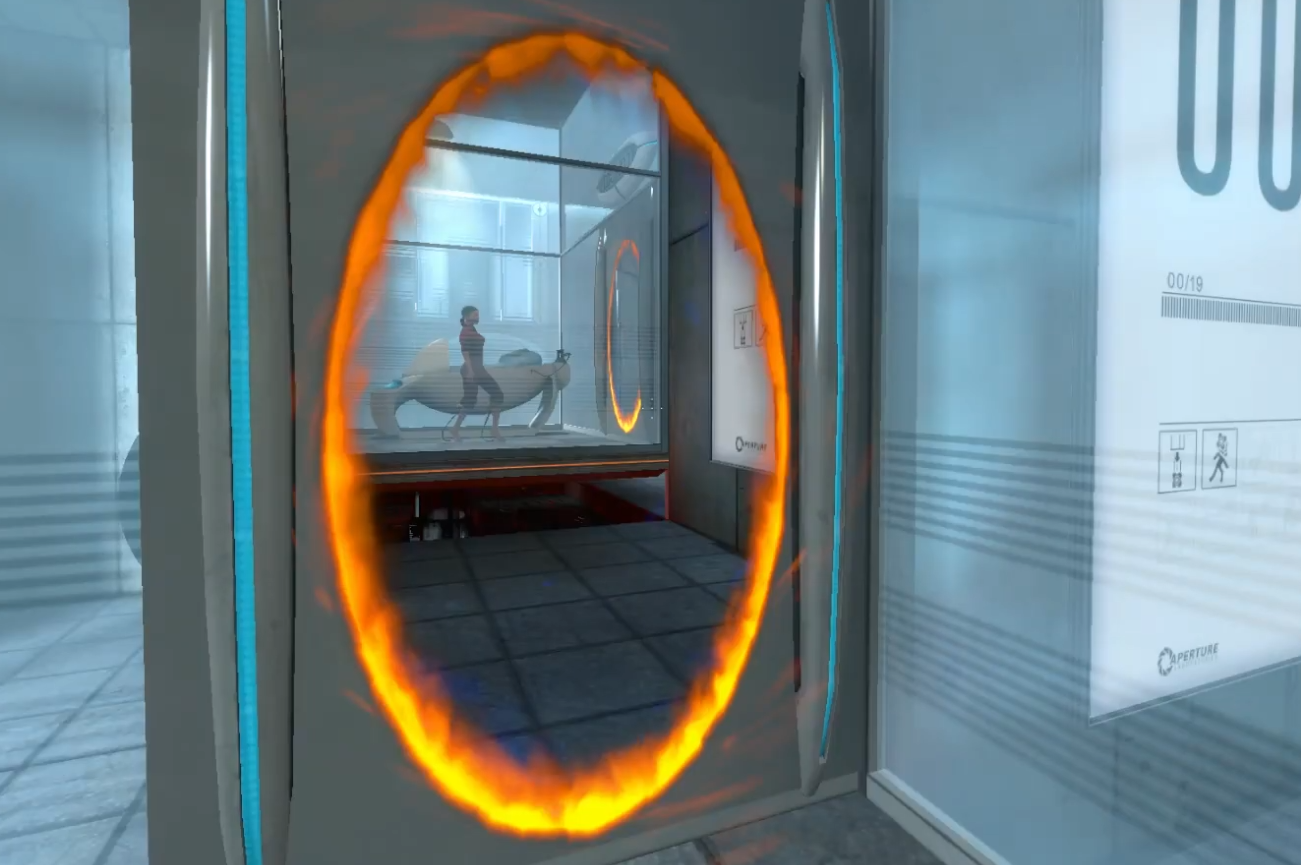
but an easy feature to implement is outlining of models, so let's take a look at that.
now, how can we make the outlining effect.
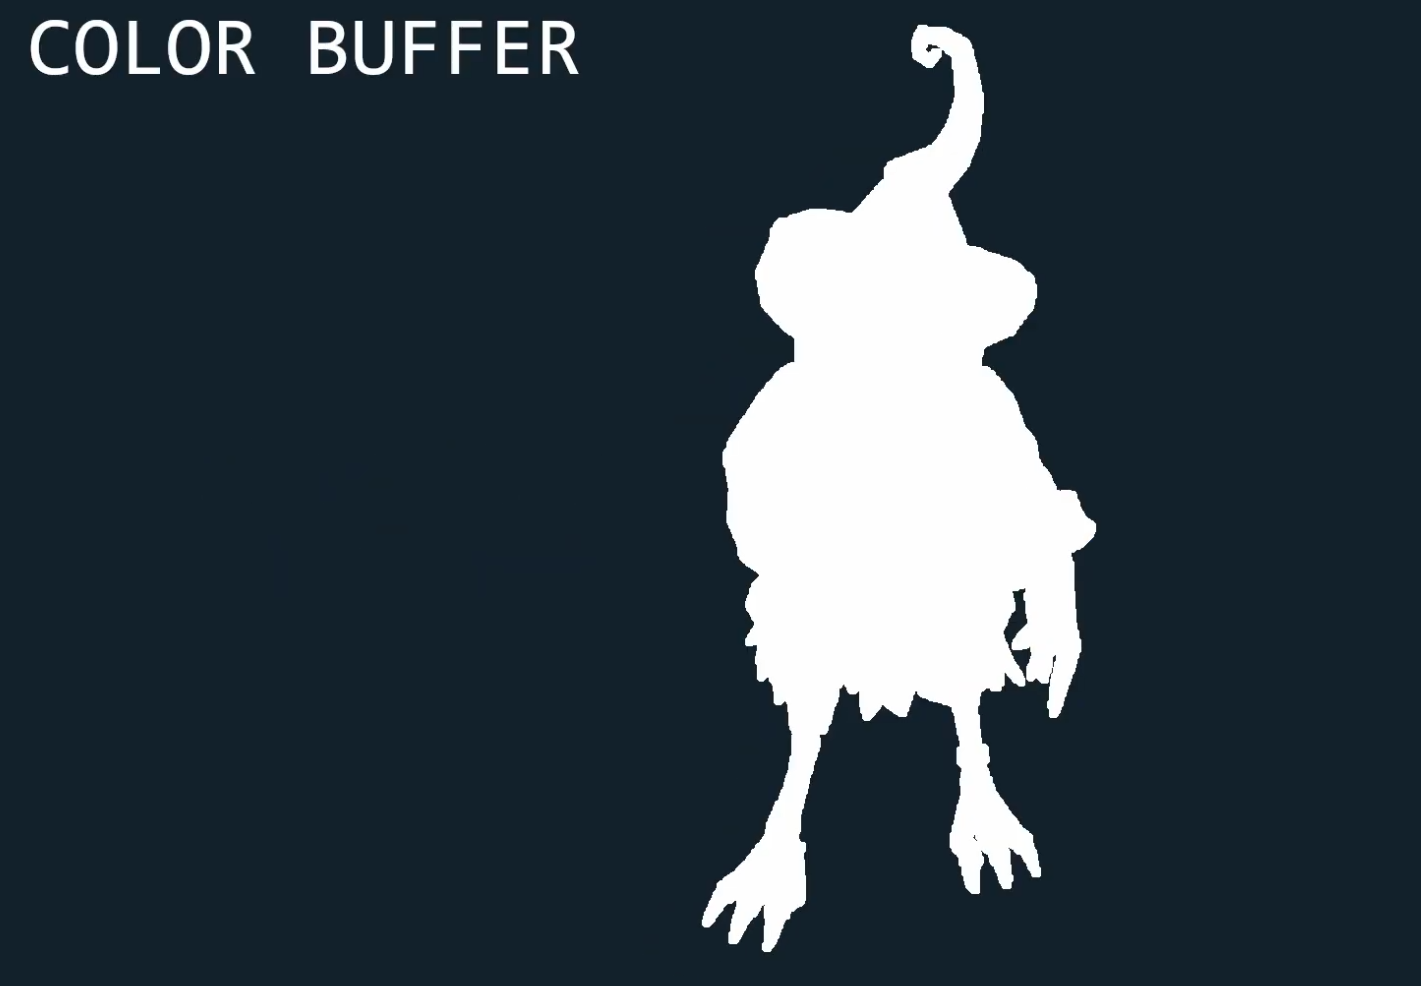
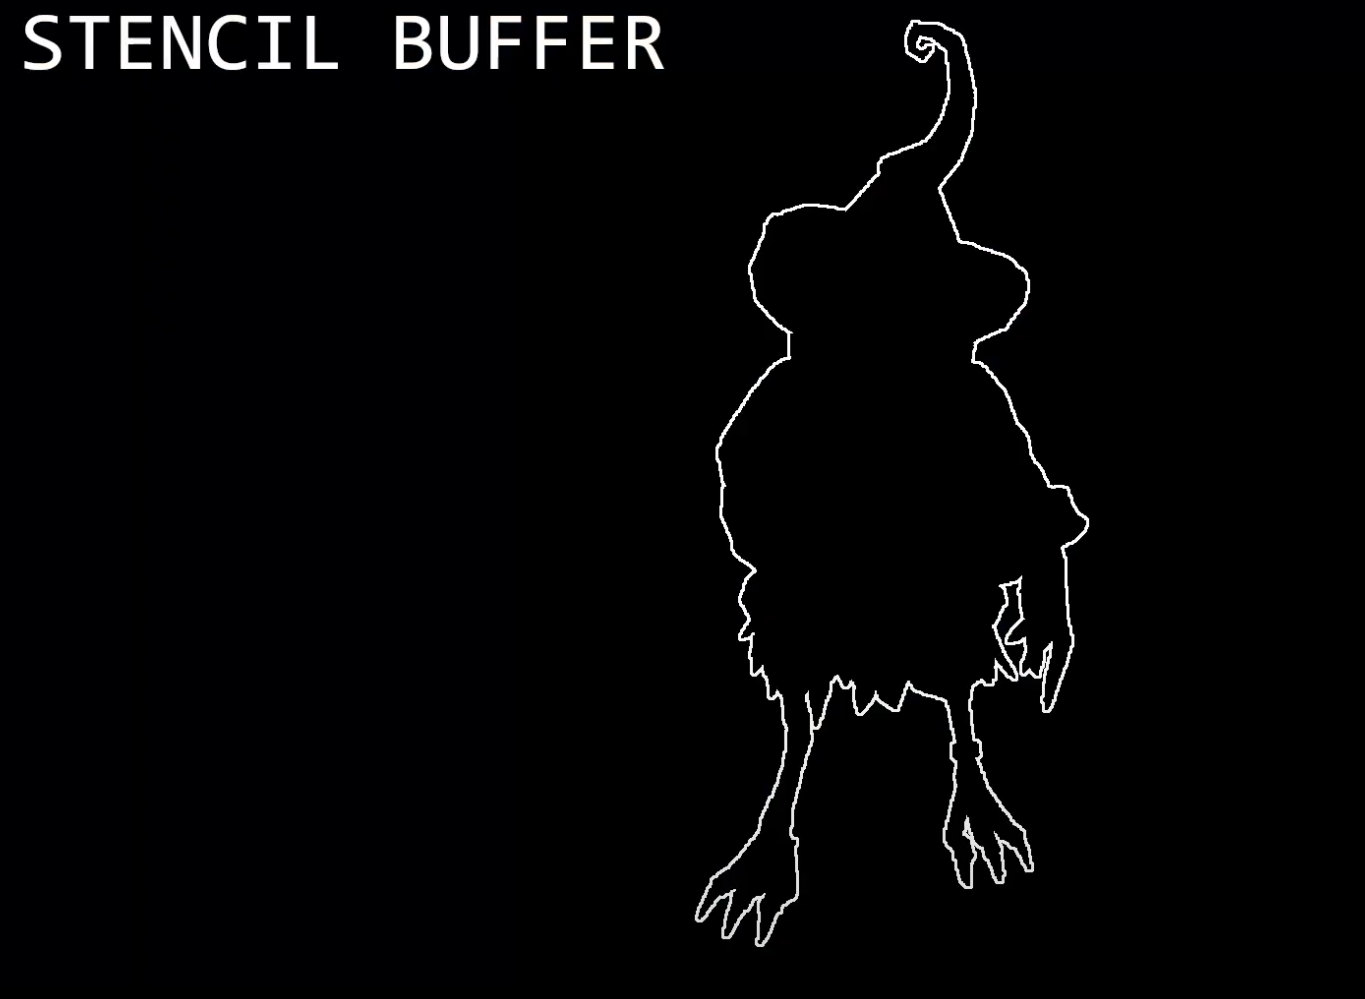
We first want to render our object like we normally do and update the stencil buffer with '1's everywhere we have a fragment from our object, and '0's everywhere we don't have a fragment from our object.
Now then, we made a mask like a spot man.(comics)
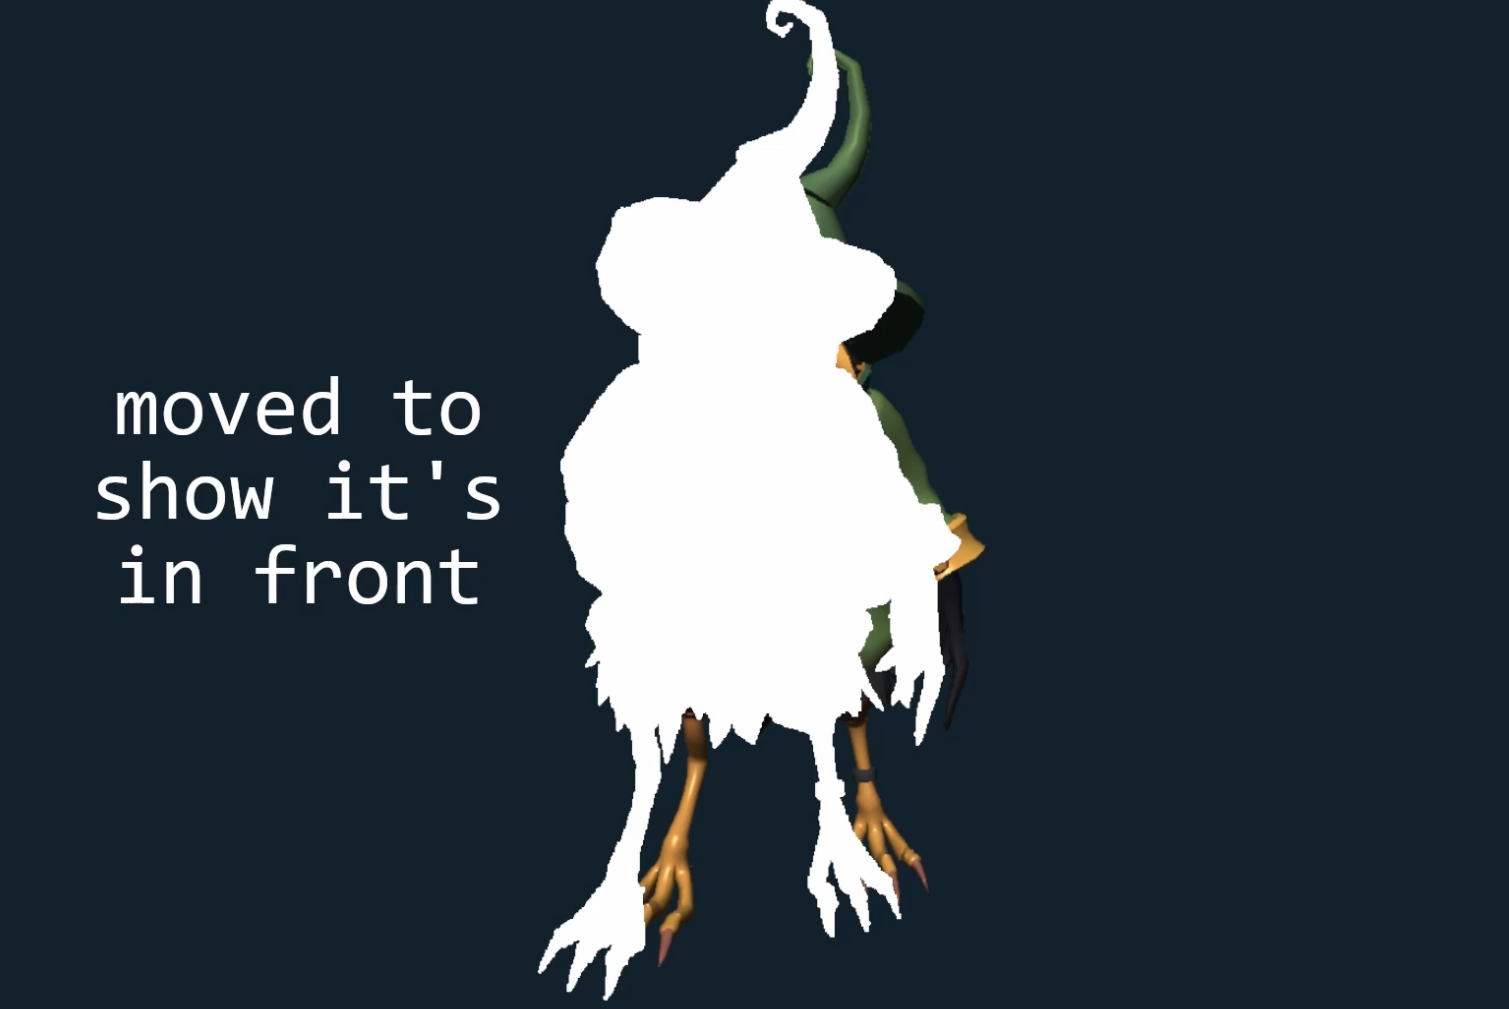
Then we want to disable writing to the stencil buffer so we don't accidentally modify it, and also disable depth testing so that we can make sure the next object we draw will be completely in front of the previous one.
now we want to render a scaled up version of the object we had before, but this time in a flat color, and with the following condition: we only draw it's fragments where the stencil value is not 1, so basically not where the silhouette of the previous object was.
Then we just restore writing to the stencil buffer and enable the depth buffer again.
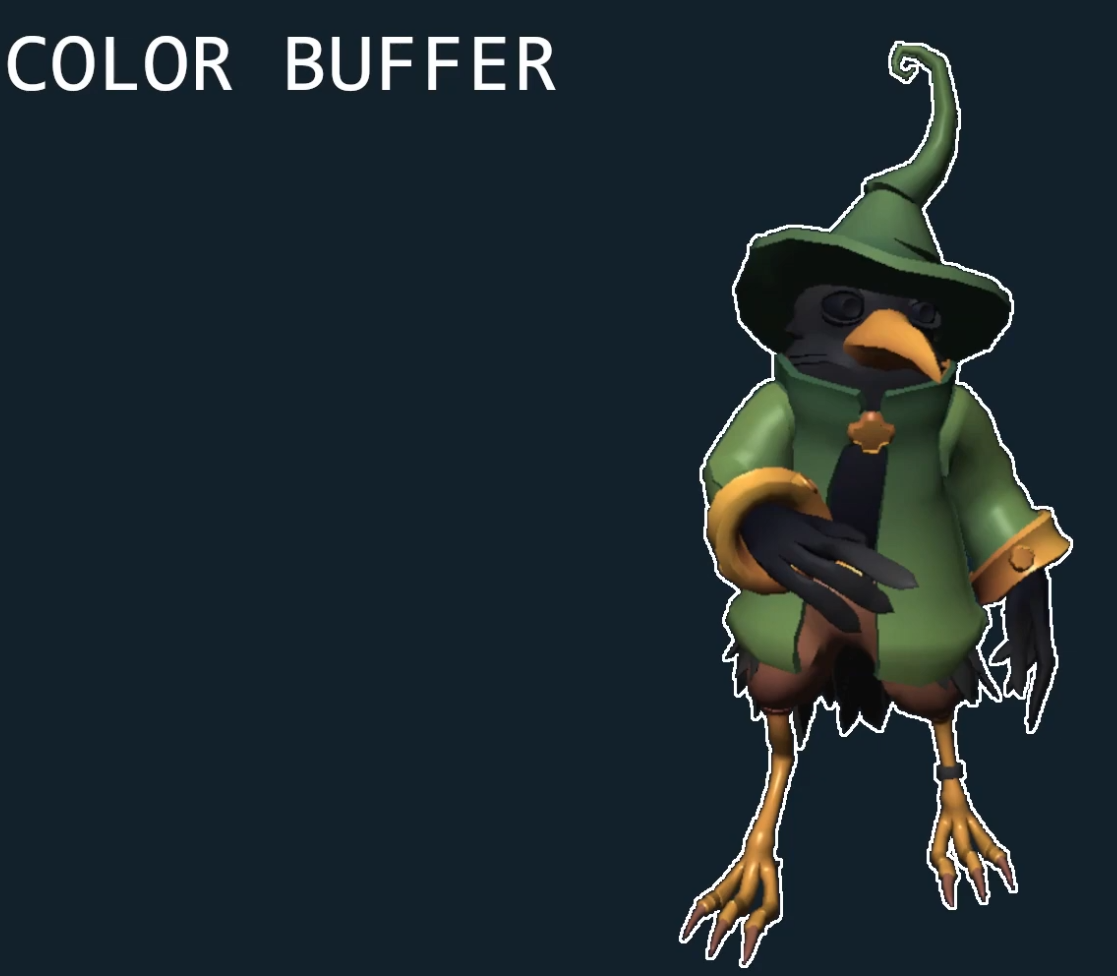
That's all we have to do.
Setting up Stencil Buffer.
We start of by enabling our buffer using glEnable
//Main.cpp
glEnable(GL_DEPTH_TEST);
glEnable(GL_STENCIL_TEST);
glStencilOp(GL_KEEP, GL_KEEP, GL_REPLACE);
This will make it so that when both the depth and stencil tests pass, we'll use the reference value specified by glStencilFunc.
First we specify our stencil test always passes, and set the reference value to 1.
Then we enable writing to all of our stencil buffer with a stencil mask of all 1s.
And now we simply draw our object.
//Main.cpp
// update the stencil buffer always passes, ref = 1, mask = 1
glStencilFunc(GL_ALWAYS, 1, 0xFF);
// enable writing to all of our stencil buffer with a stencil mask of all 1s.
glStencilMask(0xFF);
// Draw a model
model.Draw(shaderProgram, camera);
by this point in time, our stencilbuffer got the spot man, and the colorbuffer got the own model.
Remember that all the spotman values(in stencil buffer) are 1.
because we specified in the glStencilOp function that if both the stencil and depth tests pass, then make the pixel of the stencil buffer equal to 1.
for the outline
we want our stencil test to only pass when it's not equal to 1 and the depth test passes.
Then we disable out depth buffer for previously mentioned reasons, and disable writing to the stencil mask so we can keep our original silhouette.
// for the outline
// update the stencil buffer passes if (ref & mask) != (stencil & mask) -> stencil test not equal to 1 and depth test passes
glStencilFunc(GL_NOTEQUAL, 1, 0xFF);
// set mask can not modify anything.
glStencilMask(0x00);
// set next object we draw will be completely in front of the previous one.
glDisable(GL_DEPTH_TEST);

outliningProgram.Activate();
// we draw same object, but more bigger
glUniform1f(glGetUniformLocation(outliningProgram.ID, "outlining"), 1.08f);
// and using other shader, compare to previous one
model.Draw(outliningProgram, camera);
outline shader
vertex shader is just scale up by uniform value.
fragment shader is just output white color.
//outlining.vert
#version 440 core

layout (location = 0) in vec3 aPos;

// Imports the camera matrix from the Main.cpp
uniform mat4 camMatrix;

// Imports the transformation matrices
uniform mat4 model;
uniform mat4 translation;
uniform mat4 rotation;
uniform mat4 scale;
uniform float outlining;

void main()
{
	vec3 crntPos = vec3(model * translation * rotation * scale * outlining * vec4(aPos, 1.0f));
	gl_Position = camMatrix * vec4(crntPos, 1.0);
}

//outlining.frag
#version 440 core

out vec4 FragColor;

void main()
{
	FragColor = vec4(1.0f, 1.0f, 1.0f, 1.0f);
}
lastly, clear stencil buffer
The last step we need to do is to enable writing to the whole stencil, clear it by always passing the test and replacing the values with 0, and enabling the depth buffer.
// update the stencil buffer always passes, ref = 1, mask = 1
glStencilFunc(GL_ALWAYS, 1, 0xFF);
// enable writing to all of our stencil buffer with a stencil mask of all 1s.
glStencilMask(0xFF);
// Draw a model
model.Draw(shaderProgram, camera);

// for the outline
// update the stencil buffer passes if (ref & mask) != (stencil & mask) -> stencil test not equal to 1 and depth test passes
glStencilFunc(GL_NOTEQUAL, 1, 0xFF);
// set mask can not modify anything.
glStencilMask(0x00);
// set next object we draw will be completely in front of the previous one.
glDisable(GL_DEPTH_TEST);

outliningProgram.Activate();
// we draw same object, but more bigger
glUniform1f(glGetUniformLocation(outliningProgram.ID, "outlining"), 1.08f);
// and using other shader, compare to previous one
model.Draw(outliningProgram, camera);

// for clear stencil buffer
// enable writing to the whole stencil
glStencilMask(0xFF);
// clear it by always passing the test and replacing the values with 0
glStencilFunc(GL_ALWAYS, 0, 0xFF);
// enabling the depth buffer
glEnable(GL_DEPTH_TEST);
but if the model position isn't origin, and the model shape is too complicated, it may looks weird.
Second Method
A better method that doesn't take much would be to import the normals in the vertex shader.
and add those to the position vector, multiplying them by the outlining, which we'll remove from the scale matrix, and which we'll now lower from 1.08 to 0.08.
Now when scaling the vectors, instead of scaling them from their origin, we are sort of scaling them outwardly from the model using the normal as a reference for what "outward" means.
but this method also has a problem
If you have hard edges, then your normals will be close to perpendicular to one another and so will create a little gap when expanding the model.


so best method is that just modeling the bigger one, and render both of them...